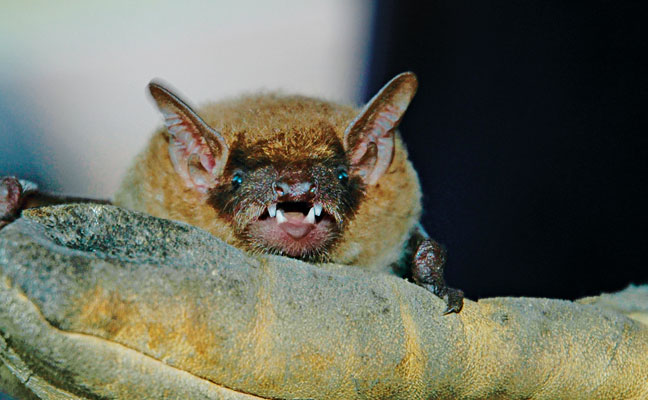
Leather, bite-proof gloves are essential personal protective equipment when dealing with bats. PHOTO: ERIC ARNOLD
There is no doubt that offering bat exclusion services can increase a business’ bottom line — when done correctly.
Several states now require licensing, training and/or certification before a company can offer bat management services. Bat conservation efforts due to zoonotic diseases, population decline, and habitat loss are a driving force for these requirements, so before thinking about offering bat management services, check your local regulations.
Once you have that squared away, it’s important to have a strategy in place before you step foot on a bat exclusion account.
Each and every time, you must look at the conflict first, to identify the symptoms and the problem. Contrary to what might have been past conventional wisdom, individual bats that belong to a maternity colony are not a problem — they are a symptom. Individual bats found in the living space that do not belong to a colony may be a problem or, based on the structure, they also may be a symptom.
For example, suppose a bat colony is using a structure, and bats occasionally access the living space. In that case, the actual problem is the structure, as it has both the conditions the bats are looking for, and access to those conditions.
By contrast, if a bat in the living space is only present because it sought shelter from a storm, the bat is the problem. In other words, just because a structure has a bat in the living space, does not mean there is a problem requiring bat exclusion.
Now, when it has been determined the structure is the problem, successful bat exclusion involves addressing at least one, if not both, of the reasons why the bats are present. By taking the following six steps, this can be accomplished.
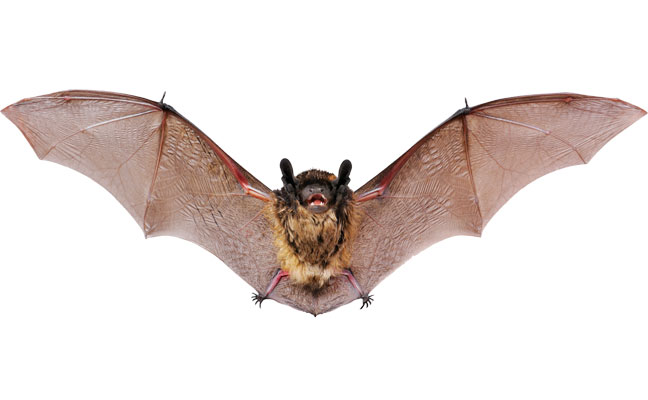
PHOTO: IGORCHERI/SHUTTERSTOCK.COM
1. INSPECT THE STRUCTURE
When conducting a bat inspection on a structure, look from the highest peak to the lowest level until bats or evidence of their presence is found. This means looking inside the structure as well as outside.
For some reason, there is a common belief that bats only enter a structure at its highest point. This couldn’t be further from the truth. Bats frequently will enter structures from below ground if access points allow them to do so.
This fact should not be that surprising, really, since many of the bat species that live in mines, caves, crevices and rock piles also are typically found in structures. It also means that bats can, and will, enter structures from just about anywhere.
An adult bat needs an opening that is approximately 0.375-inch high and 1.25-inch long to enter a structure. In terms of a rounder opening, anything that is the size of a dime or larger may allow access.
I have seen flight-capable pups climb through 0.5-inch-square hardware cloth. I also have seen adult bats climb through openings smaller than 0.25-inch when under high stress, when those openings were made from loose-fitting construction materials. However, I view those cases as the exception and not the rule, so the sizes listed above should be considered the norm.
Common areas that allow for access include ridge vents, dormers, gable vents, soffit, siding, corner channels, gutters, window and door frames, windows (especially when they have an air conditioner installed), fireplaces, exposed ridge beams, warped lap siding, missing bricks or mortar, rake edges, storm cellar doors, and material transition areas, just to name a few. Bats cannot create their own openings, so they must use an existing one. The areas bats seem to prefer are more elongated, crack-style openings, and not huge gaping holes — although those should be addressed, too.
During an inspection, don’t just look for oil rubs or guano attached to the side of the building. Such signs usually require a large, established number of bats. The majority of cases you’ll likely encounter will be a colony of fewer than 100 bats, and they’ll likely leave no sign of how they are accessing the structure.
Furthermore, don’t count on actually seeing the bats, unless you’re on a bat watch (more of that in a minute). Based on temperature, time of day, and how much they have been harassed, bats may quietly hide in areas where they cannot be seen. I had one case where more than 300 bats were hiding from me, and the only sound they made was the scratching of their claws as they moved from one area to another while avoiding the inspection light.
So… if looking for rub marks, guano on walls, or the bats themselves aren’t good tactics, what should you be looking for? Guano that has fallen down onto other materials.
When guano is found, looking up is the easiest way to see whether bats are present. If you find bats, try to count how many are present, and identify the species. Information you collect from your inspection should be used to determine pricing, services and required equipment, so don’t skimp on the data you collect.
Keep in mind that even if no guano is found, a bat colony still could be at the structure. There are quite a few times when bats may be living in the soffit areas, where it is cooler, instead of the main building. In those cases, unless the bats can be heard, the best way to determine services is to conduct a bat watch.
A bat watch is precisely what it sounds like: Watching the structure, either shortly before dusk or right around dawn, looking for bat activity. This is a useful tool that works well for maternity colonies, but not so well for migratory colonies, bachelor colonies or feeding roosts.
2. DEVELOP A PLAN
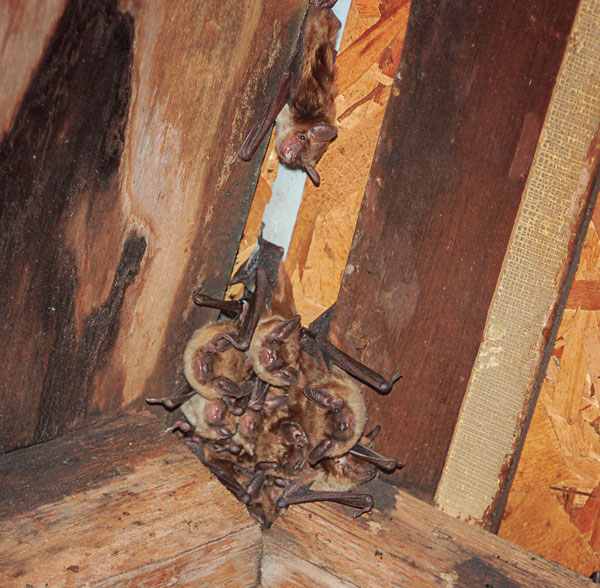
Looking up during a bat inspection can reveal a lot. PHOTO: ERIC ARNOLD
Determine what services need to be offered, and the material(s) and equipment required, from your inspection notes. Most bat work will require at least a single ladder. Many times, it will require multiple ladders of varying sizes, scaffolding and even aerial lifts. Just as with bird services, this may mean your technicians will need additional training such as fall protection, ladder safety and aerial lift operation. Keep these additional training costs in mind when developing a rate for the job.
When choosing materials, remember that structures constantly expand and contract based on weather conditions. Construction material that stretches is preferred over material that does not. Additionally, the material must be applied properly. Many warranty calls could be avoided simply with proper installation. If such terms as tooling, backer rod, bond breaker, two-sided adhesion, maximum expanding, minimum expanding, glazing, cure time, minimum temperature, maximum temperature and ambient temperature don’t mean much, additional training is highly advised.
If remediation services are to be included, remember to look at the disposal of the guano and objects covered by and/or containing guano, and replace insulation or building materials that were removed. While guano alone is an organic, not a biohazard, if it is contaminated with asbestos, zinc, copper, or lead dust, there will be additional restrictions on how it can be collected and disposed. Again, consider the costs for additional training and upkeep if these services are performed in-house.
3. ELIMINATE ACCESS POINTS AND INSTALL EXCLUSION DEVICES
Once your client agrees to the plan, it is now time to start the exclusion process. Begin by sealing all of the openings and potential openings bats could use with the appropriate building materials. Make sure not to close any of the openings the bats currently are using. Again, make sure to work from the highest peak to the lowest point below grade.
Once all of these areas have been addressed, install the exclusion material or devices. Generally, this means either bat netting or bat cones.
When deciding what type of exclusion material or device to use, consider where it will be placed. Areas such as rake boards and gable vents are good places to use netting, for example, whereas dormers and ridge ends usually are better suited to bat cones.
Once the bat exclusion devices are installed, leave them in place for a minimum of 10 days. In early spring and fall, I prefer to leave them up for 21 days to make sure all the bats have left. Bats get sick and injured just like we do, so they may not leave the structure every night. By leaving the exclusion products in place for this time period, the chance of accidentally trapping bats inside the structure decreases.
4. RE-INSPECT, AND REMOVE DEVICES/MATERIALS
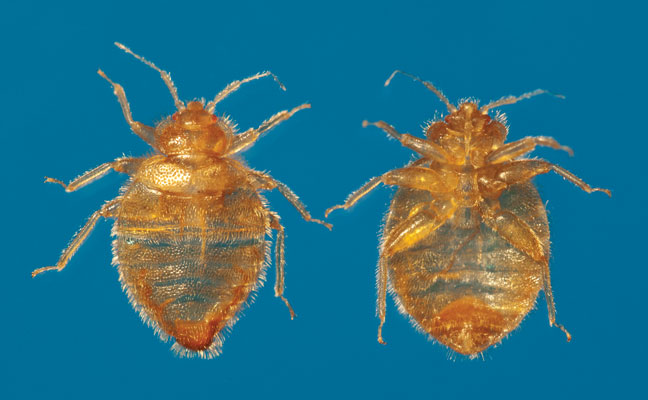
Bat bugs (seen here in ventral and dorsal views) are slightly smaller and hairier than bed bugs, and are beige or dark brown in color, compared with bed bugs, which are red or medium brown. PHOTO: COURTESY OF, AND COPYRIGHTED BY, GENE WHITE, PMIMAGES@EARTHLINK.NET
Before removing any material or device, reinspect the structure to ensure the bats are gone. More than once, I’ve gone to finish a bat exclusion job only to find bats still inside — even though the client was certain there weren’t any problems. Sometimes, this was because I’d missed an opening; other times, it was a problem with the exclusion device. Regardless of the reason, the issue needs to be addressed. Once the cause has been addressed, a new timeframe needs to be established before the materials or devices are removed.
If no bats are found, remove the exclusion material and devices, and seal the openings with the proper building material(s).
An easy way to monitor bat activity during the exclusion process is to put several pieces of white paper or a white bed sheet over the main area where guano was previously accumulating. If a new accumulation of guano is present, there is most likely still a problem. If the material is clean, the sealing activities can most likely continue.
5. GUANO REMOVAL AND PEST CONTROL
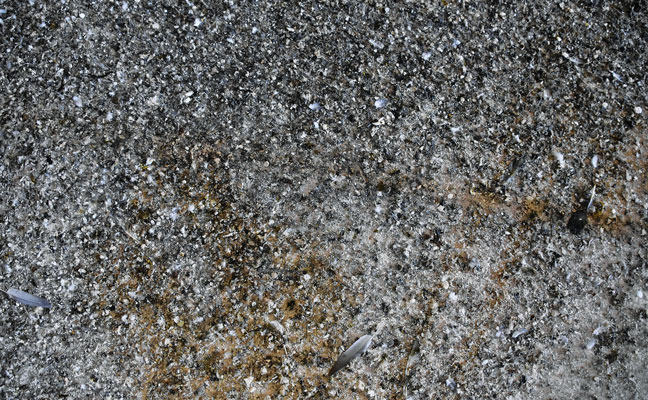
Bat guano can carry Histoplasma capsulatum, the fungus that causes the lung disease histoplasmosis. PHOTO: TZAHIV/ISTOCK / GETTY IMAGES PLUS/GETTY IMAGES
Once all the bats are excluded, removal of guano, soiled insulation, contaminated materials, and Eastern bat bug (Cimex adjunctus) treatments can be performed. Before treating for this common cousin of bed bugs, make sure all material in the treatment area has been removed. Bat bugs can be found on and in insulation and guano piles, not just on the areas where the bats were roosting.
After these services have been concluded, replacing removed insulation can begin. Make sure not to block any airflow from the soffit area, nor cover any electrical devices that are not rated for coverage.
Again, this is an area where additional training may be required because of state laws, technician safety and business liability.
6. MAINTAIN THE STRUCTURE
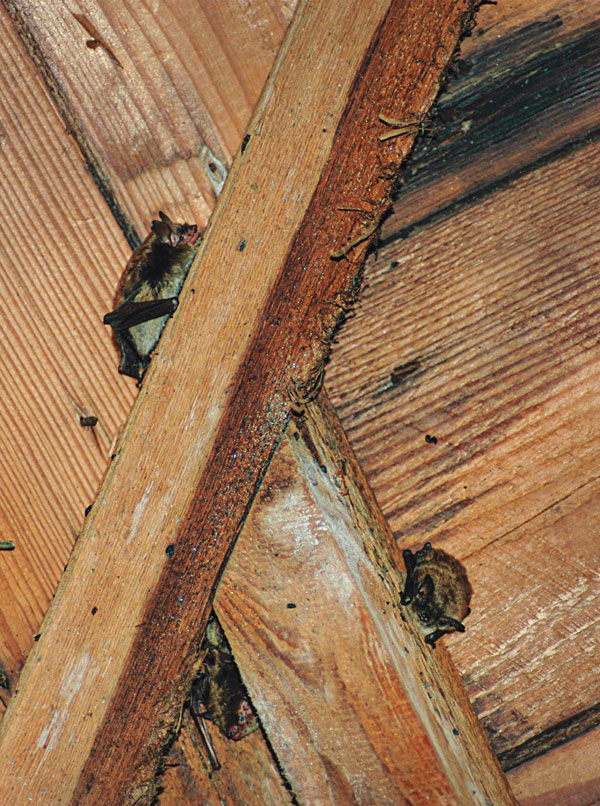
It can take more than one visit to rid an account of bats, even if the client doesn’t notice their presence. PHOTO: ERIC ARNOLD
The last step to a successful bat exclusion is the one most overlooked: maintaining the structure. It is far easier to prevent another bat issue through maintenance than to start from square one again. Whether it is the client’s responsibility or your responsibility, make sure everyone is on the same page — and don’t leave it to chance.
My preferred method is to offer a maintenance program for up to nine years. For an annual fee, it includes a yearly inspection, and covers any repairs to work I have done. Acceptance of the program extends the warranty for that year. The program not only allows for additional revenue from the job, but the ability to address issues before they become problems. Bats will continue to test the structure each year, and I’ve redone the homes of more than a few clients who let their coverage slip after a single year.
At times, problems will occur in other areas that didn’t need treatment initially. This could be from new construction or just everyday wear and tear. When this happens, an additional fee can be charged for addressing these new areas. Then the yearly maintenance rate can be adjusted for the upcoming year.
Bat exclusions can be good for the bottom line when performed properly. By following these six steps, many of the pitfalls involved with bat exclusions can be avoided.
Additional information can be found at the Wildlife Control Technology (WCT) Online Training Center, WildlifeTraining.thinkific.com.
ARNOLD is a wildlife control trainer, writer, technician, business owner and volunteer. He is editor of both Wildlife Control Technology and Fur Takers of America. He can be reached at editor@wctmagazine.com.
Leave A Comment